Spinach Microgreens 101: Benefits and How to Grow

Spinach Microgreens are a superfood that you can grow right in your own kitchen. They are full of health benefits and taste great too. Learn everything you need to know about spinach microgreens.
Spinach Microgreens Overview
What are they?
Spinach microgreens are very young spinach plants, harvested within just a week or two of sowing the seeds.
Differences between baby spinach and microgreens
They are sometimes confused with baby greens, although the two are actually very different.
Baby spinach leaves are true leaves picked from a maturing spinach plant before it has reached its full size.
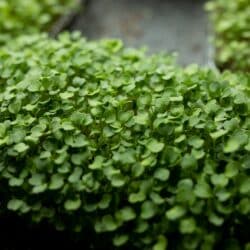
Spinach microgreens, on the other hand, are complete little plants, harvested when the cotyledon leaves have developed but before the true leaves have come in.
Spinach microgreens are part of the Amaranthaceae family and are related to other healthy foods like amaranth, beets, quinoa, and Swiss chard.
Benefits of microgreens?
They are rich in nutrients – and the best thing about them is that they give you all the goodness of mature spinach in a much more concentrated form. In other words, the nutrient content is concentrated in the young plants.
If you or your kids struggle to eat enough leafy green vegetables, you can eat a far smaller quantity of spinach microgreens and still receive the same benefits!
Potential Health benefits
Nutrient content
Like their mature counterparts, spinach microgreens are a great source of iron, an element that supports a range of metabolic processes throughout the body.
High in insoluble fiber – which helps support your digestive health – spinach microgreens are also a good source of calcium, folic acid, vitamin C, vitamin K, vitamin E, and beta-carotene.
Beta-carotene is a type of carotenoid that your body converts to vitamin A. It has antioxidant properties and may help protect against serious conditions such as heart disease, high blood pressure, and cancer. Spinach microgreens are a rich source of vitamin A (as beta-carotene) and are a great addition to your diet.
Eye health
Spinach microgreens are good for eye health, too. That’s because they contain lots of zeaxanthin and lutein. These carotenoids help protect your eyes from the damage caused by sunlight.
What sets spinach microgreens apart from mature spinach leaves is the fact that their nutrient density is many times higher.
A handful of microgreens is very easy to eat – even for kids – yet it gives you all the benefits of a much larger portion of mature plants. It’s a great way to get a lot of nutrition quickly.
See my related article on the best microgreens.

How to Grow Spinach Microgreens: Step by Step Guide
You can buy spinach microgreens in stores, although they are not readily available everywhere. But you can’t really tell how fresh they are – and they can be very pricey.
A great alternative to store-bought microgreens is growing your own microgreens! It is easy to do and the entire process – from sowing your seeds to harvesting your crop – is incredibly quick. This makes it an enjoyable project to undertake and especially fun for kids.
Growing your own spinach microgreens is also environmentally friendly and extremely cost-effective. You’ll need very little in the way of equipment, yet you’ll be able to consistently produce a healthy crop.
The supplies you’ll need
Here’s a look at everything you will need to start growing your own supply of spinach microgreens.
Microgreen spinach seeds or regular spinach seeds
Since spinach microgreens are just very young spinach plants, you don’t need any special seeds. Regular spinach seeds will be just fine, whether they are marketed as spinach microgreens seeds or not. There is no significant difference between the two.
My only recommendation is to ensure that they are organic spinach seeds. That way you will avoid consuming pesticide residues or other harmful additives.

Growing medium
There are several different options you could try here. Soil is the most popular, but you need to be careful to choose a lightweight soil with a fine grain.
Spinach seeds are very small, and the right type of soil will make it easier for the roots to spread and become well-established. Potting garden soil is suitable and seed soil is even better.
If you’re concerned that using soil indoors might be messy, you could try using a grow mat instead, or even coco coir mats.
Containers
To make it easy to harvest your spinach microgreens, you’ll need shallow trays (1 to 2 inches deep).
If you’re just testing the waters, you could use the eco-friendly option of recycled fruit containers or pie plates. However, these will likely become too small should you decide to grow spinach microgreens on a regular basis.
The tray in which you plan to grow the microgreens will need holes for drainage. This will prevent the growing medium from becoming waterlogged, which – in turn – could lead to mold and rot.
You will also need a second tray, larger than the growing tray. You will place this beneath the growing tray and use it for watering the seeds. Watering seeds from the bottom keeps their leaves and stems dry – another good way to prevent mold.
Spray bottle
You’ll need this for watering the seeds with cold water immediately after you’ve sown them.
Light source
Microgreens need light to trigger the process of photosynthesis. This produces chlorophyll and turns the leaves green.
You can grow spinach microgreens in natural sunlight, but they will need plenty of it. Ideally, you should sit your growing trays on a sunny windowsill to expose your plants to as much light as possible.
If available space is a challenge – or you live in an area where there are limited hours of sunlight – consider using a grow light instead.
This will allow you to grow your microgreens anywhere in your home. It will also make it easy to provide the plants with a uniform and consistent source of light. The result will be a good crop of microgreens that grows evenly.
Soaking spinach microgreen seeds
If you are familiar with growing microgreens, you’ll know that most varieties – with the exception of pea microgreens – don’t require you to soak the seeds before sowing them.
The purpose of soaking seeds is to break down their hard shell so they can soak up water. Most microgreen seeds are so tiny that this just isn’t an issue, so no soaking is required.
Spinach seeds, however, are a little harder. They will grow just fine without being soaked, but lots of people prefer to soak them as it helps them germinate a little more quickly. This step, though, is entirely optional.
How to sow your spinach microgreen seeds
First, place your growing medium inside your container until it just comes up to the rim.
Using your hand, ensure the surface is level and pat it down very gently. (Do not pat it down if you’re using coconut coir, as it can become too compact).
Gently spray the soil with water from your bottle and allow it to soak in. Then lightly spray the surface again.
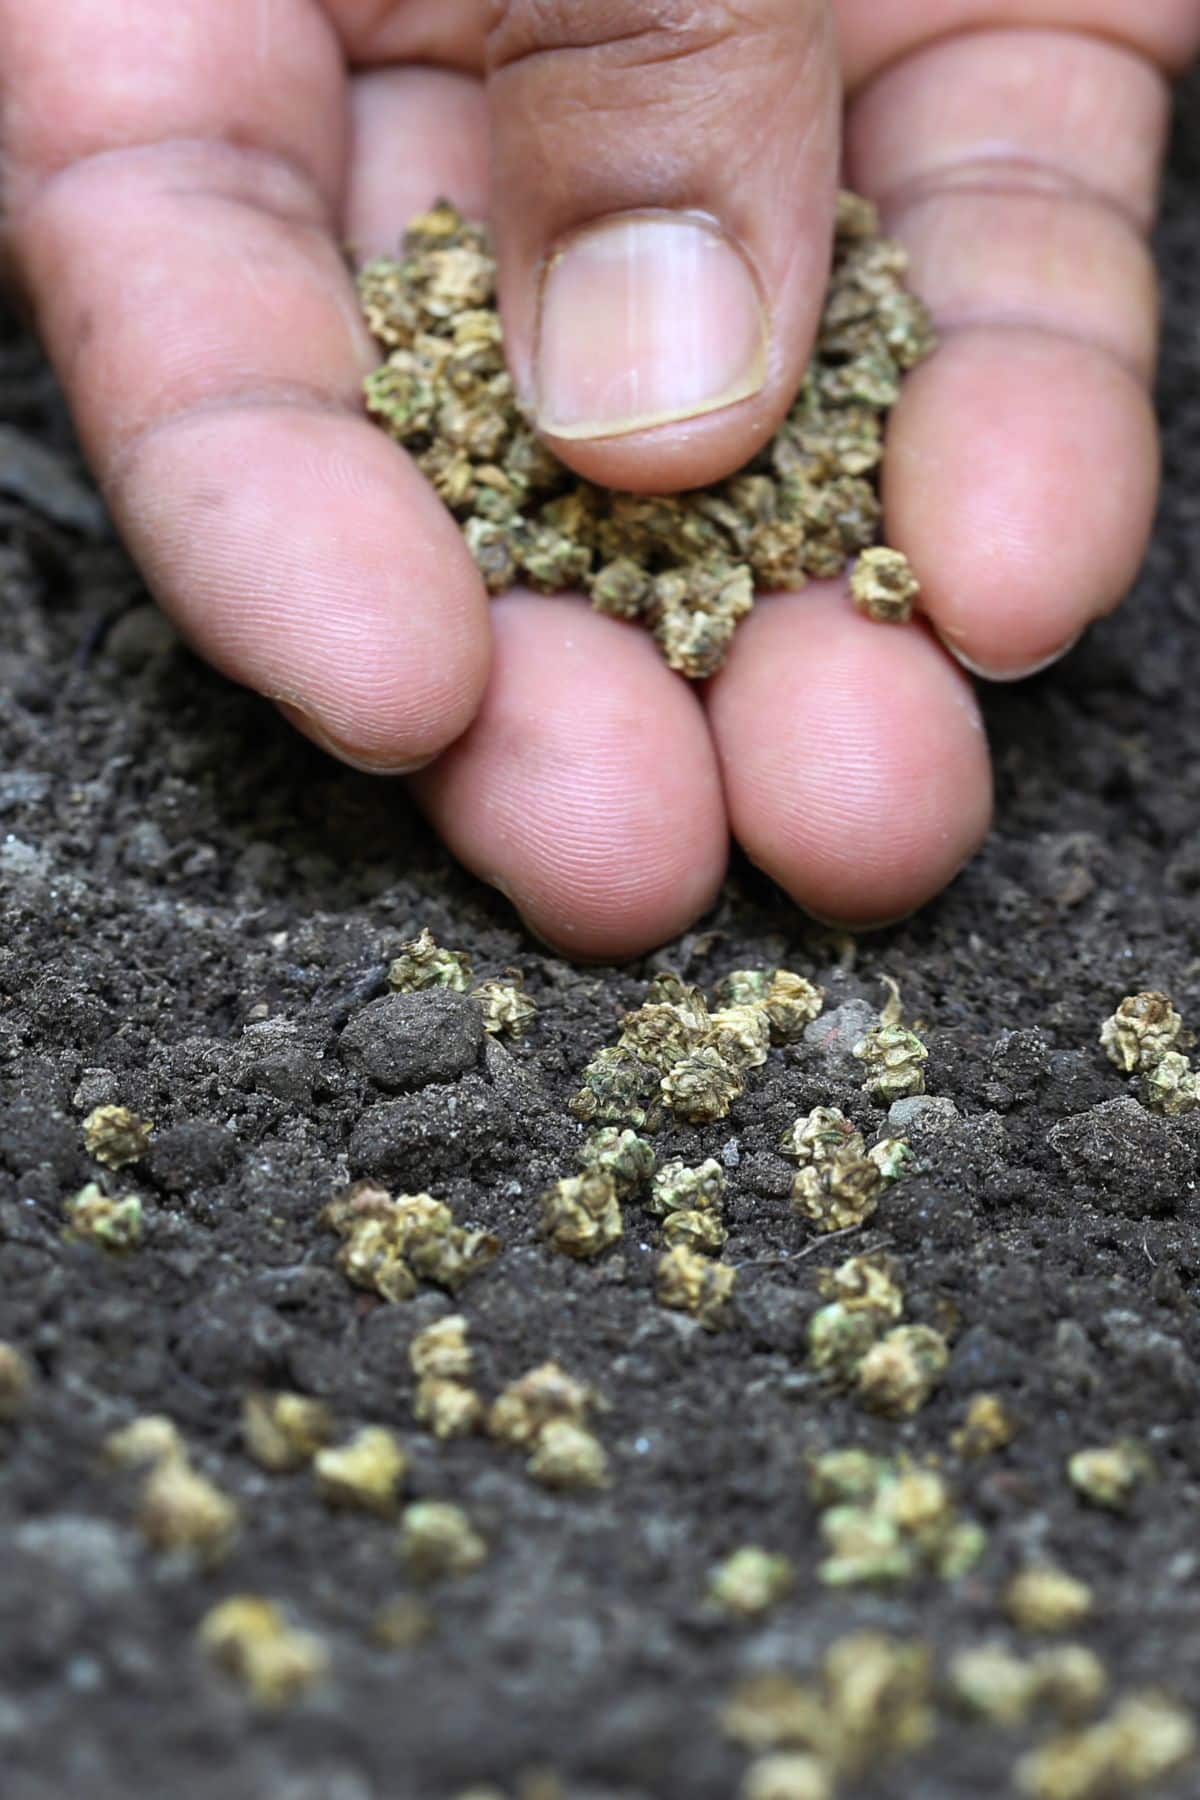
It’s now time to sow your seeds.
Carefully spread them in an even layer over the surface, covering as much as possible so that the growth will be dense. Be sure, however, that the seeds are in a single layer – piling them up will limit the airflow and they may start to rot.
How to germinate the seeds
There are two things your seeds need now in order to germinate – humidity and darkness.
Rather than covering them with a thin layer of soil, the best way to create this environment is to spray your seeds lightly using the spray bottle, then cover the tray.
Use your second, larger tray for this purpose. Put something fairly heavy (up to 5 pounds) on top to hold the cover in place. This extra weight will also push the seeds firmly down into the soil, helping the roots reach further and become well-established.
Leave the seeds to germinate in a warm spot for 4 to 5 days.
Take a look under the cover to see if they have sprouted. They are ready for the next step when almost all of the seeds have leaves and have started to lift up the cover, even with the weight on top.
If it looks as if they will need a bit longer, spray them with water then replace the cover and leave them for another couple of days.
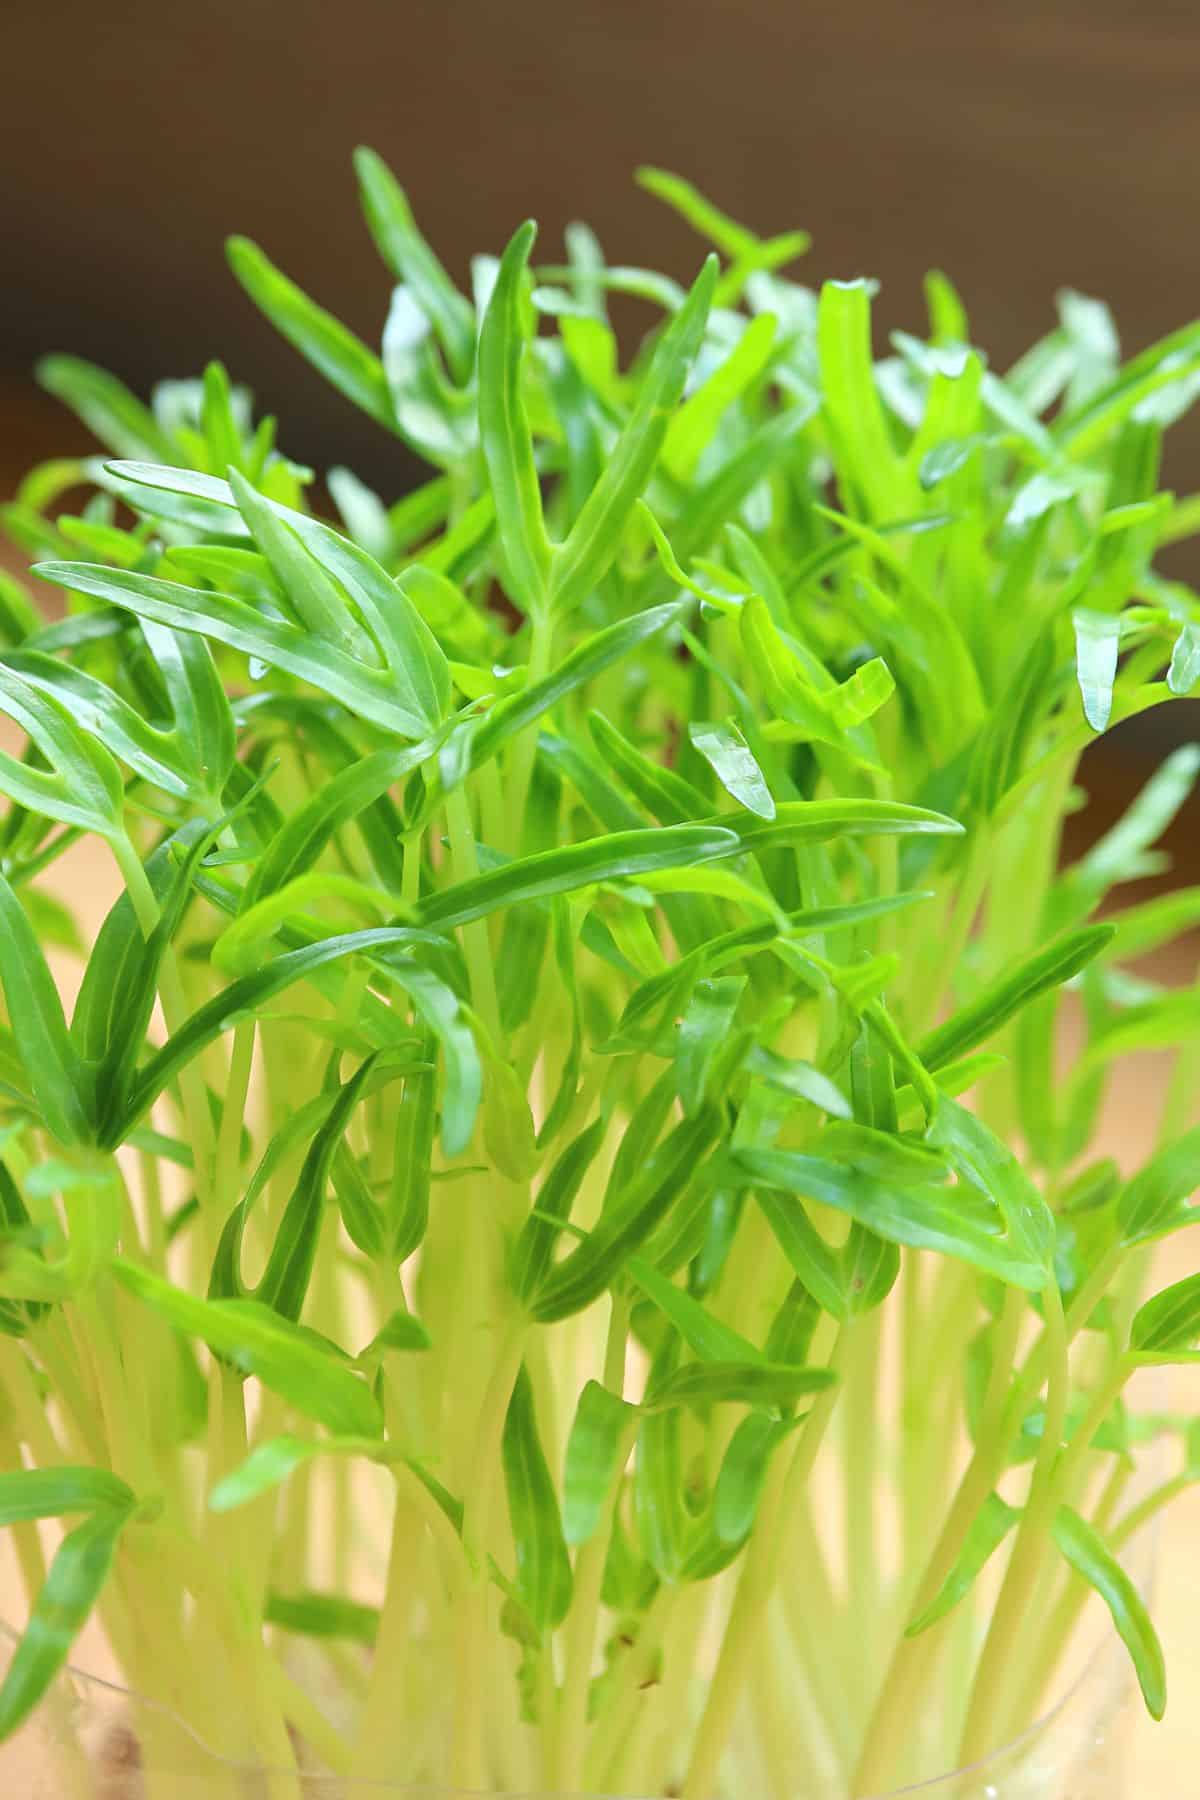
Expose the spinach microgreens to light and watch them grow!
When the seeds are ready, remove the cover and expose them to lots of light. If you opted to use a grow lamp instead of natural light, place it around a foot above them and use it for at least 6 hours per day.
Place the growing tray on top of the second, larger tray and water the seeds well. The soil will absorb the water via the drainage holes in the growing tray. Once the soil is moist, remove the second tray to avoid overwatering the seeds. Too much water may cause them to rot.
From now on, you will be watering the seeds using the bottom tray. You’ll need to do this as often as it takes to keep the soil consistently moist.
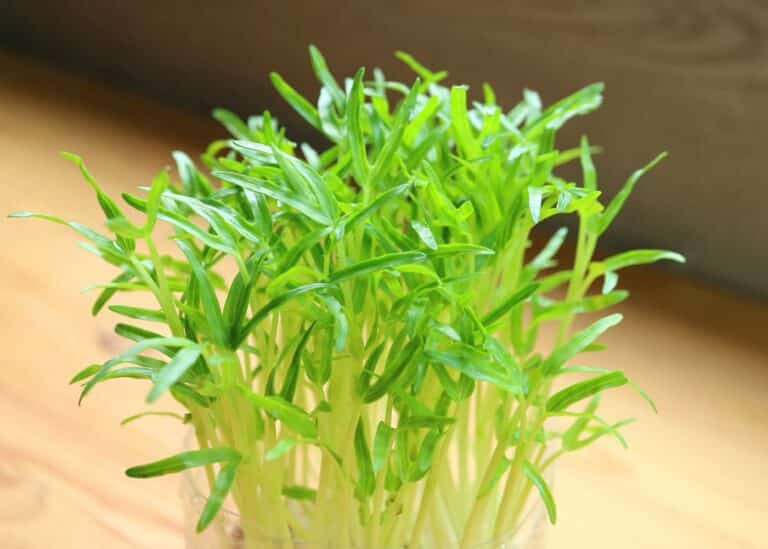
Within just a few days your seeds will develop into microgreens. At first, they will be quite pale in color but this will deepen as time goes by. If they start to look tall and spindly yet still yellowish in color, it’s likely they are not receiving enough light.
It’s important to rectify this – using a grow light if necessary – as pale microgreens will be inferior in taste and less nutritious than those that are fully green.
Aim to keep your growing microgreens in a warm area – around 70℉ (21℃) is ideal. They also require good ventilation and a humidity level of around 50%.
Harvesting your spinach microgreens
Around 7 to 10 days later, the moment you’ve been waiting for will arrive and your spinach microgreens will be ready to eat!
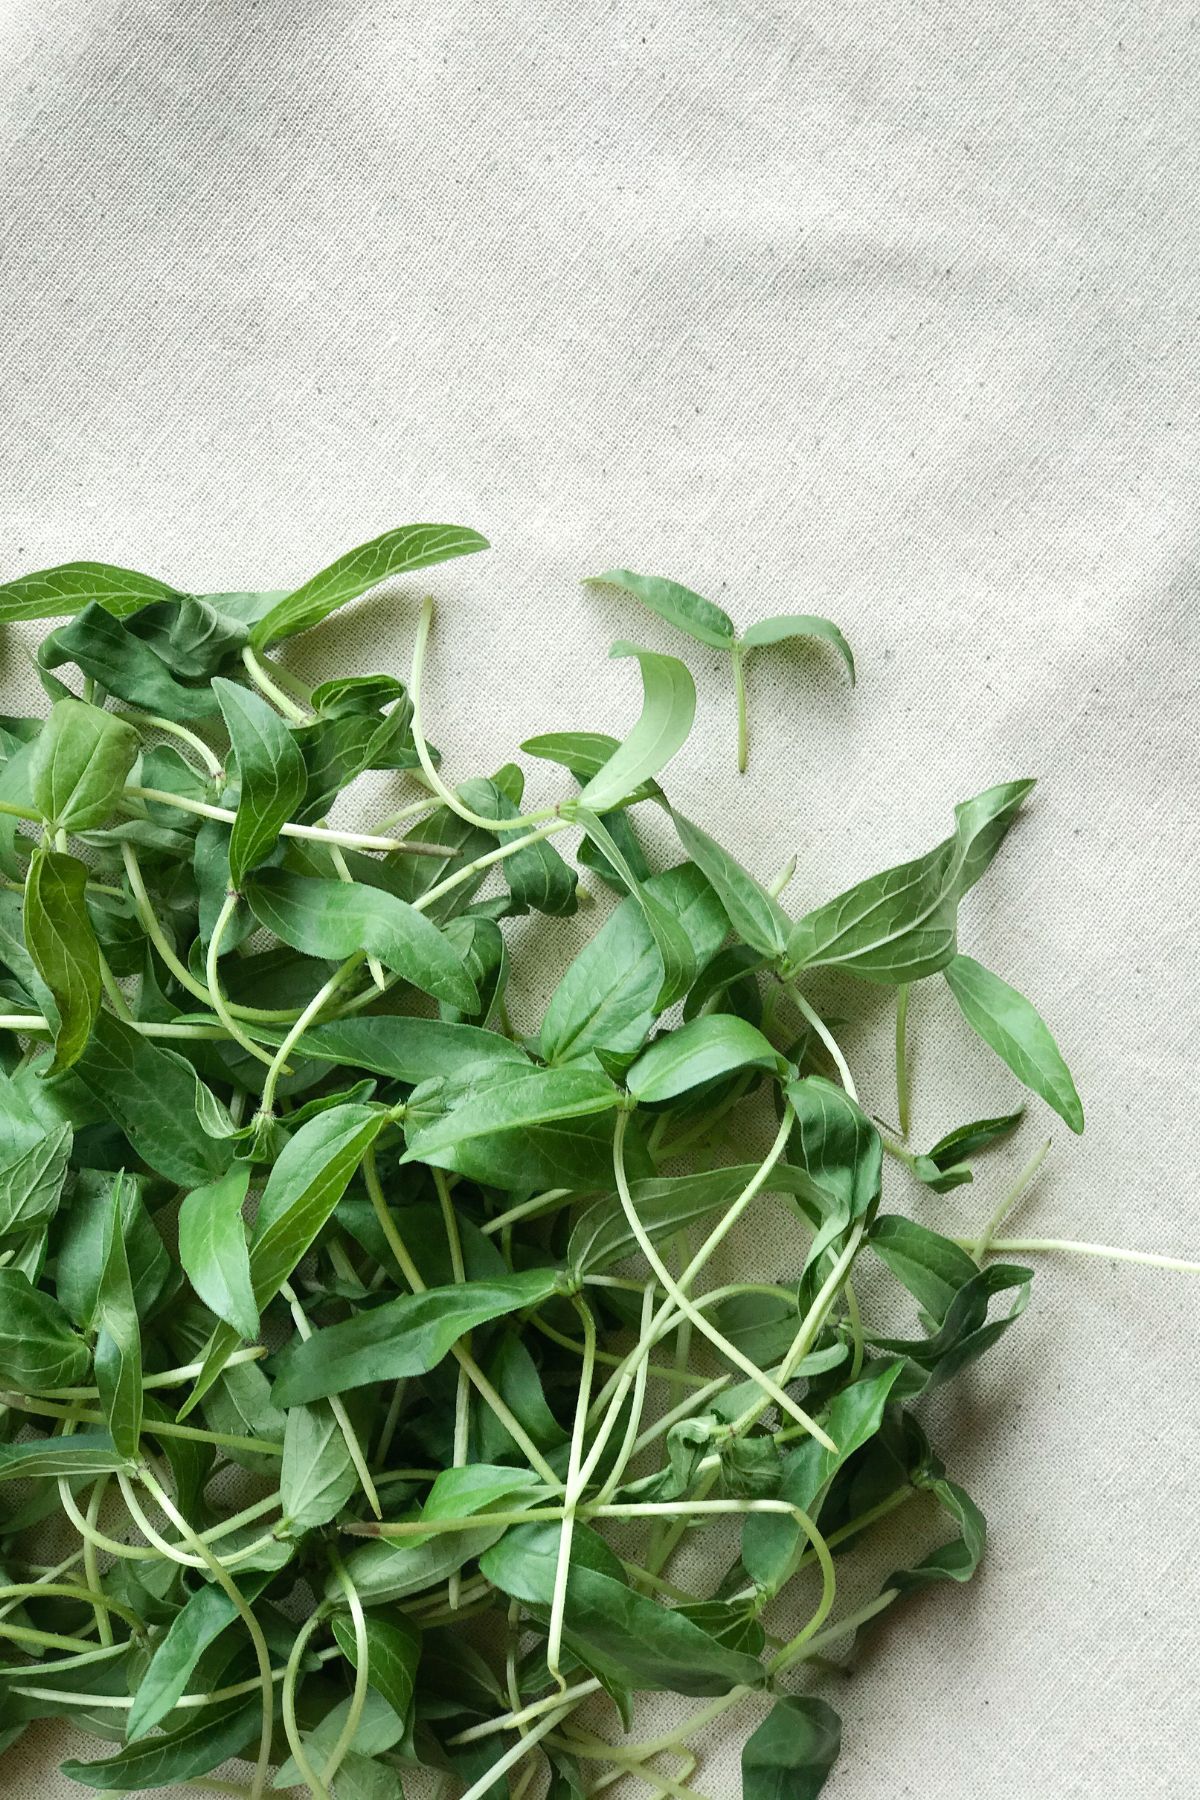
At this point, the cotyledons will be open but the true leaves will only just have started to form in between them. This is when they are most nutritious and taste the best.
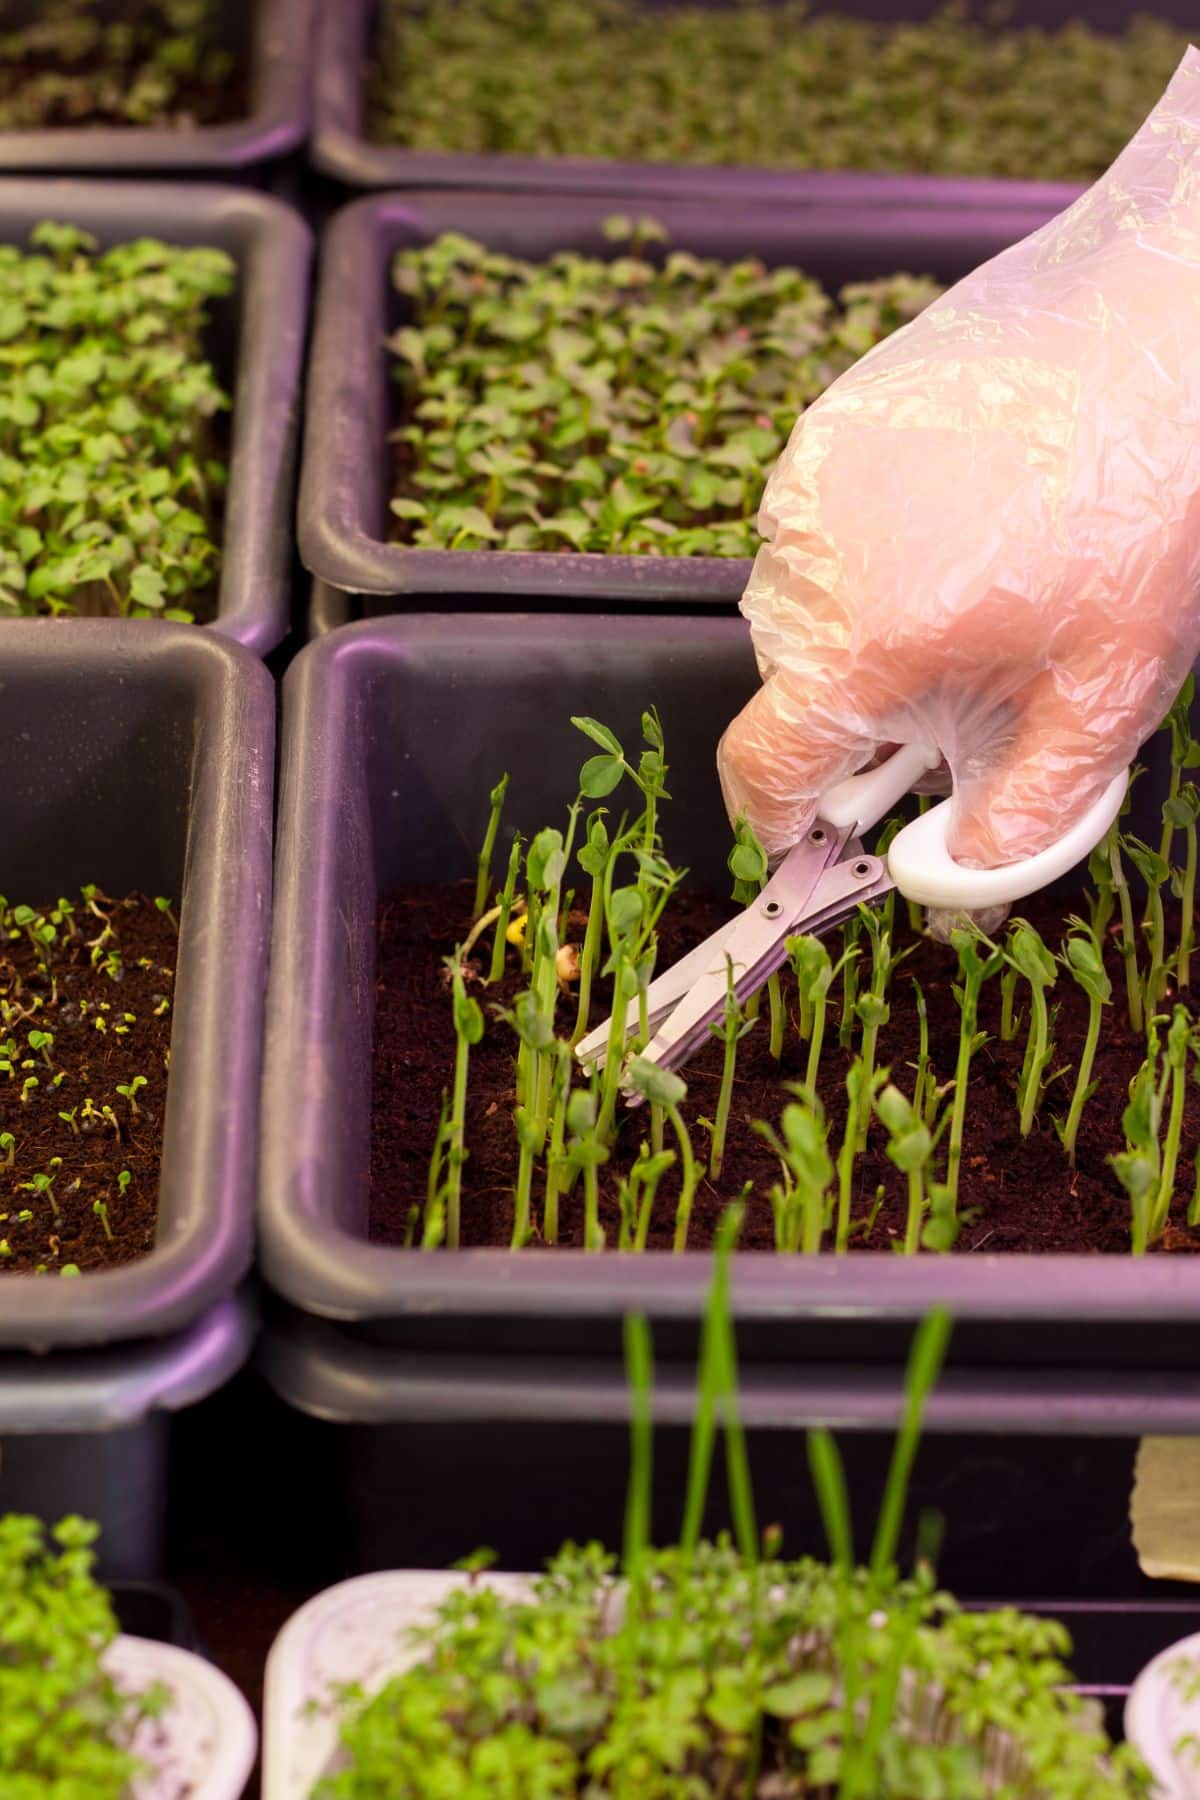
Stop watering the microgreens 12 hours before harvesting to ensure they are dry. This makes it easier to store them afterward. Using a sharp pair of scissors, snip off the microgreens in bunches just above the surface of the soil.
You can harvest the entire batch in one go or cut what you need. But it’s important to make sure the entire crop is harvested before it gets too old.
Sadly, the microgreens won’t regrow after harvesting so you will need to sow more seeds for a second batch.
Storing your spinach microgreens
It’s best to cut your microgreens as you need them, but if you want to harvest them all then you will need to store them in the fridge.
Wrap them in a paper towel to absorb any moisture then place them into a plastic bag or airtight container. They will retain their nutrients and flavor for up to a week.
Recipe Steps
Step One
Place your growing medium into a suitable container.
You can use seed soil, potting soil, growing mats, paper towels, or coconut coir.
Step Two
Spray your growing medium lightly with water and allow it to sink in. Respray the surface once again.
Step Three
Pre-soak your spinach seeds (if you wish) then sprinkle them over the surface, ensuring they are fairly dense but in a single layer.
Step Four
Gently mist the seeds with a spray bottle, then cover them to retain moisture and block out the light.
Place a weight on top and leave to germinate until all the seeds have sprouted (around 5 days or so).
Step Five
Remove the cover and expose the seeds to plenty of natural light or use a grow lamp. Water regularly.
Step Six
Harvest within 10 to 14 days of planting.
Spinach Microgreen FAQs
Spinach microgreens grow satisfyingly quickly! You can be enjoying them in your meals just 10 to 14 days after planting the seeds. This is because they are harvested so soon after germination when their nutritional value is at its peak.
Like mature spinach, spinach microgreens are very mild in flavor. If anything, they are a little sweeter than mature leaves and very easy to incorporate into all sorts of dishes.
Here are some great ways to use them:
Add them to things like sandwiches, burgers, and tacos for a nice, crunchy texture.
Throw a handful into a salad.
Use them to garnish pasta dishes, scrambled eggs, omelets, and more.
Blend them into your daily smoothie or juice.
Add them in the last few minutes of cooking time when preparing soups, stir-fries, and stews. This will preserve their texture and nutrients.
Spinach microgreens generally have a higher concentration of nutrients compared to mature spinach leaves, including vitamins, minerals, and antioxidants. They are particularly rich in vitamins A, C, and K, as well as iron and potassium. While both microgreens and mature leaves are highly nutritious, microgreens may offer a more concentrated source of these beneficial nutrients.
Growing Tips
- Use organic spinach seeds.
- For ease of harvesting, make sure your growing container is no more than 1 to 2 inches deep.
- Instead of soil you can use grow mats, coconut coir, or paper towels.
- After germination, always water your seeds from the bottom using a second tray beneath your growing tray.
- Ensure your spinach microgreens receive plenty of natural light as they grow, preferably on a sunny windowsill. If you use a grow lamp, place them under it for at least 6 hours daily.
- For best results, try to maintain a room temperature of around 70℉ (21℃), with 50% humidity and adequate ventilation.
- Ensure you harvest all your microgreens once they have two cotyledon leaves and the true leaves are just beginning to form.
- Store unused microgreens in the refrigerator for up to 7 days in a plastic bag or airtight container.
Don’t Miss These Additional Microgreen Guides!


How to Grow Spinach Microgreens
Spinach Microgreens are a superfood that you can grow right in your own kitchen. They are full of health benefits and taste great too. Learn everything you need to know about spinach microgreens.
- Total Time: 240 hours 30 minutes
- Yield: 4 Servings
Ingredients
- 2 tablespoons organic spinach seeds
- seed soil/potting soil
Instructions
- Place the soil into the growing container until it reaches the rim. Pat gently to level it out.
- Spray the soil with water. Wait until it is absorbed then spray again.
- Pre-soak the seeds if desired then sprinkle them evenly over the surface of the soil in a single, dense layer.
- Mist the seeds with water, then cover and place a weight on top. Leave to germinate for around 5 days, until all the seeds have sprouted.
- Remove the cover and expose the seeds to plenty of natural sunlight.
- Water the growing microgreens from the bottom as often as necessary to keep the soil consistently moist.
- Harvest the microgreens when they are a rich green color and have two fully opened cotyledon leaves, between 7 to 14 days after sowing.
Notes
- Use organic spinach seeds.
- For ease of harvesting, make sure your growing container is no more than 1 to 2 inches deep.
- Instead of soil you can use grow mats, coconut coir, or paper towels.
- After germination, always water your seeds from the bottom using a second tray beneath your growing tray.
- Ensure your spinach microgreens receive plenty of natural light as they grow, preferably on a sunny windowsill. If you use a grow lamp, place them under it for at least 6 hours daily.
- For best results, try to maintain a room temperature of around 70℉ (21℃), with 50% humidity and adequate ventilation.
- Ensure you harvest all your microgreens once they have two cotyledon leaves and the true leaves are just beginning to form.
- Store unused microgreens in the refrigerator for up to 7 days in a plastic bag or airtight container.
- Prep Time: 30 minutes
- Cook Time: 10 days
- Category: Microgreens
- Method: Gardening
- Cuisine: Healthy
- Diet: Vegetarian
Nutrition
- Serving Size: 1 tablespoon
- Calories: 1
- Sugar:
- Sodium:
- Fat:
- Saturated Fat:
- Trans Fat:
- Carbohydrates: 0.1 g
- Fiber: 0.1 g
- Protein: 0.1 g
- Cholesterol:
Don’t forget to join my newsletter list to get exclusive clean eating recipes and tips. The newsletter is 100% free with no spam; unsubscribe anytime.
About the Author: Carrie Forrest has a master’s degree in public health with a specialty in nutrition and is a certified holistic nutritionist. She is a top wellness and food blogger with over 5 million annual visitors to her site. Carrie has an incredible story of recovery from chronic illness and is passionate about helping other women transform their health. Send her a message through her contact form.
Note: this post is for informational purposes only and is not intended as medical advice. Please consult your healthcare provider for recommendations related to your individual situation.


It’s so fun to grow your own!